The following tests were conducted at APPLIED TECHNICAL SERVICES, INCORPoRATED and were determined at laboratory conditions.
Testing Overview
APPLICATION
The Post Tension Plug's 1'' of coverage ensures that the tendon has been cut correctly and the grease cap has been properly seated. The reaming tool is designed with a 1" recess so the user will never damaged the tendon end or grease cap.
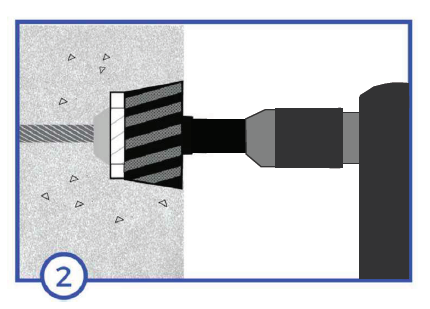
Insert the reaming tool into the cavity until the top of the reaming tool is flush with the slab edge. This will remove 1/16" of the inside of the cavity and will create a clean & roughened surface that is most suitable for bonding. After the pocket has been roughened by the reaming tool, remove the dust with a blower or brush.Figure 1-3
Place the reaming tool on a right-angle drill and set to a speed that suits the user (600-1200 RPM). With the drill on, place the reaming tool into the stressing pocket until the tool is flush with the slab edge. This process with shape the pocket into a uniform profile that emulates the precast plug.
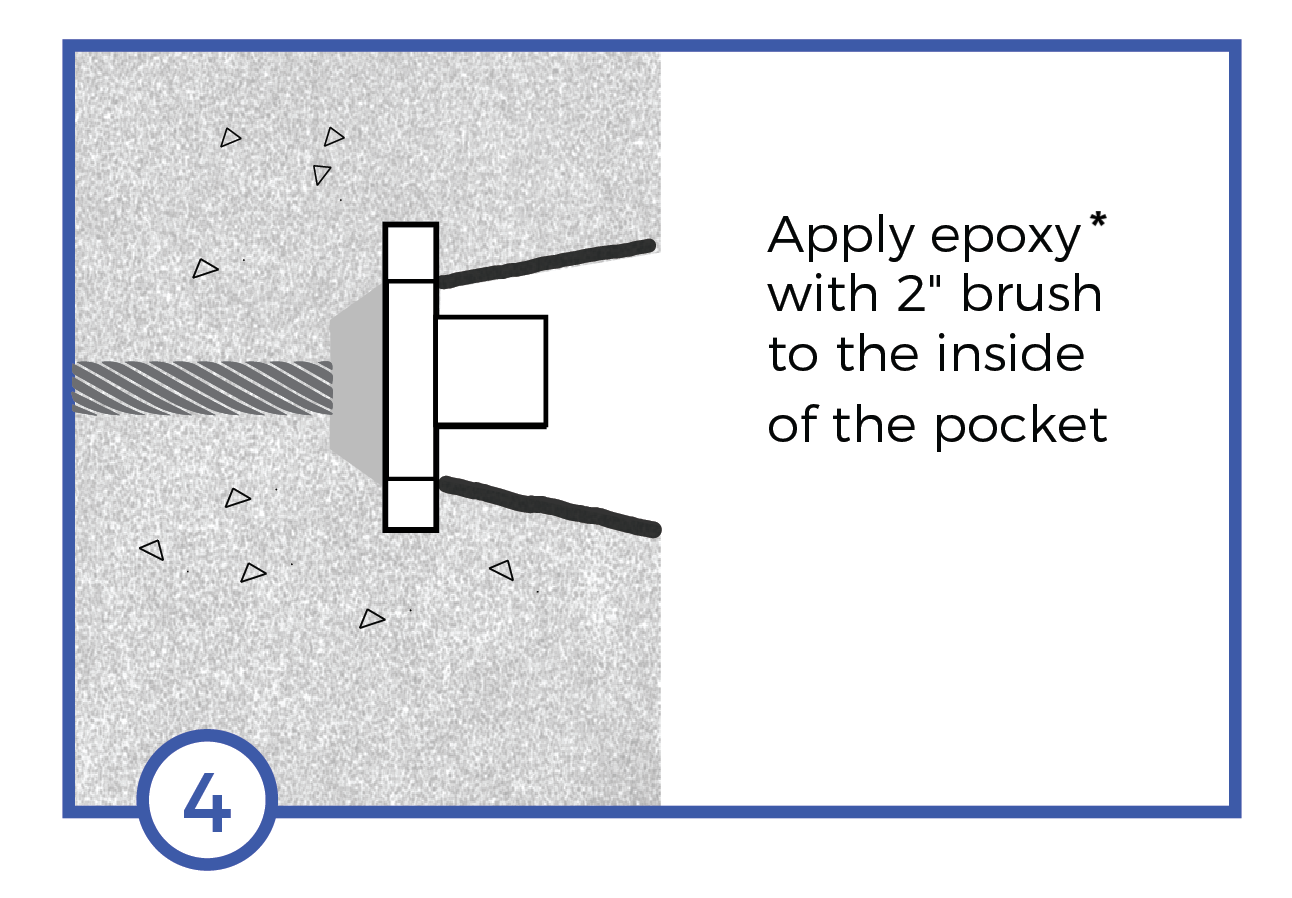
After the pocket is reamed, use a hand blower or brush to clear the pocket of any dust left over from grinding the inside of the pocket. Next, apply a liberal amount of epoxy into the newly reamed cavity, making sure to cover the entire pocket.
Lastly, apply epoxy onto the the sides of the Post Tension Plug and press the plug until flush with the slab edge. Apply epoxy into the reamed out cavity with a 2" paintbrush. Next, apply additional epoxy to the Post Tension Plug and insert the plug until flush with slab edge. Spread with any excess epoxy around the circumference of the plug to create a 100% watertight line of the defense. Figure 4-6
Figure 4 *Painting epoxy inside the pocket is only necessary for remediation projects, where the removal of the grout often causes large deformities inside the pockets.


